
Hey! I’m going to walk you through the step-by-step process of installing a wireless video doorbell, like a friend who’s done this a dozen times, standing right beside you.
Let’s get it done.
Safety First
While a wireless doorbell installation is far simpler than a wired one, a few safety points still apply:
- Wear safety glasses when drilling into walls, brick, or masonry.
- Scan the wall with a stud finder for hidden pipes and cables before drilling.
- Work in dry conditions.
Tools You’ll Need
- Power drill
- Drill bits
- Phillips-head screwdriver
- Stud finder with AC wire detection
- Level (or a free level app on your phone)
- Pencil
- Measuring tape
- Safety glasses
In the Box (Verify Before Starting)
Open your doorbell box and confirm it contains all of the following:
- Wireless video doorbell unit
- Mounting bracket
- Mounting screws
- Security/anti-theft screw + security screwdriver bit
- Rechargeable battery pack
- USB or proprietary charging cable
- Quick Start Guide with QR code for app setup
Step 1: Charge the Battery First
Plug in the doorbell or its removable battery pack using the cable included with the box. Wait for the solid green LED to turn on before doing anything else. Skipping this is the #1 reason new installations fail on day one. This typically takes 1–4 hours, depending on the model and how depleted the battery was out of the box.
Battery life expectation: Most wireless video doorbells last 1–6 months per charge, depending on motion activity, video resolution settings, and temperature.
Step 2: Choose the Right Mounting Location
Getting the placement right before you drill saves a lot of frustration. Take your time here.
- Mount at 48 inches (122 cm) from the ground. It is the sweet spot for capturing faces.
- Avoid pointing the camera directly into the sun, as it will wash out the video.
- Use the included wedge adapter if your wall is angled.
- Make sure the location is within range of your home Wi-Fi router.
Step 3: Check the Wall Material
Identify what your wall or door frame is made of before drilling:
- Wood door frame — Easiest to drill; use standard wood screws.
- Vinyl siding — Use the included mounting plate spacer to create a flat surface.
- Brick or masonry — Requires a masonry drill bit and plastic wall anchors.
- Stucco — Similar to masonry; pre-drill carefully to avoid cracking the surface.
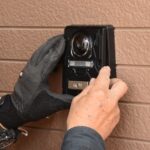
Step 4: Mount the Bracket
- Hold the bracket up, use a level to straighten it, and mark the screw holes with a pencil.
- Drill pilot holes. For brick or masonry, insert the plastic wall anchors first.
- Screw the bracket in firmly.
Step 5: Attach the Doorbell
Slide the unit onto the bracket until it clicks, then drive the included security screw (Torx bit) at the bottom so it can’t be removed without the tool. Finally, give the unit a firm tug to confirm it is locked securely in place and does not wobble.
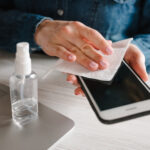
Step 6: Download the App and Create Your Account
Download the correct app for your doorbell brand from the App Store (iOS) or Google Play Store (Android):
| Doorbell Brand | App Name |
| Ring | Ring |
| Google Nest | Google Home |
| Arlo | Arlo Secure |
| Eufy | eufy Security |
| Blink | Blink Home Monitor |
| Reolink | Reolink |
Open the app and create a new account using your email address.
Step 7: Connect the Doorbell to Wi-Fi via the App
- Once the account is created, tap “Add Device,” then scan the QR code on the unit or the Quick Start Guide.
- Press and hold the setup button on the doorbell until the LED flashes.
- Select your 2.4 GHz Wi-Fi network in the app, then enter your Wi-Fi password.
Step 8: Tune 3 Settings
- Motion Zone — draw a box around your porch only.
- Motion Sensitivity — start at medium, adjust after a day.
- Video Quality — drop to 720p if your Wi-Fi signal is weak.
Step 9: Test Everything
Do all of this before calling the job done:
- Press the doorbell button — your phone should receive a push notification within 1–3 seconds.
- Open a live view in the app — the camera feed should load within 3–5 seconds.
- Walk in front of the camera and confirm that a motion alert fires on your phone.
- Test two-way audio — tap the microphone icon in the app, speak, and have someone stand at the door to confirm they can hear you. Speak back and confirm you can hear them through your phone.
You Did It!
Your wireless video doorbell is live, connected, and watching your front door 24/7, and you installed the whole thing yourself.
Well done. Go enjoy the peace of mind.