Stop water damage and mold before they take over your bathroom.
Let us teach you to use a silicone caulk to create a strong, waterproof seal around tubs, sinks, and other joints. It holds up in wet conditions, lasts longer, and keeps your bathroom looking clean.
Tools & Supplies Needed
- 100% silicone caulk (mold-resistant and paintable if needed)
- A dripless caulk gun for better control
- A spout cutter and seal puncher for quick prep
- Mineral spirits for cleanup
- A scraper to remove old caulk
- A cloth for smoothing
Step 1: Prep the Surface
Start by removing all old caulk from the seams. Take your time here because leftover residue will weaken the new seal. Once removed, clean and dry the area completely so the silicone sticks properly.
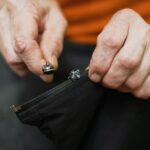
Step 2: Apply the Caulk
Cut the tip of the tube, puncture the inner seal, and load it into the gun. Hold the gun at about a 45° angle and run a steady bead along the seam. Move slowly and keep pressure consistent to avoid gaps or uneven lines.
Step 3: Smooth and Seal
Use your finger or a smoothing tool to press the caulk into the joint. This step ensures a tight, watertight bond and gives a clean finish. Repeat the process anywhere else that needs sealing, like sinks or backsplashes.
Step 4: Finish and Cure
Let the caulk set for about three hours before using the area. Clean your tools with mineral spirits for the best results.