
Quick Stats of the Project
- Category: 30-Minute Project
- Difficulty: 2/5 (Requires careful wire labeling)
- Tools: Small Flathead or Phillips screwdriver, painter’s tape (for labeling), smartphone, and a power drill (optional).
A programmable or “smart” thermostat is the brain of your home’s HVAC system. Upgrading from an old manual dial can slash your energy bills by 10% or more by automatically adjusting the temperature while you’re asleep or at work. It’s a high-tech upgrade that pays for itself within the first few months of use.
Step-by-Step Instructions
Step #1: Cut the Power
Before touching anything, go to your breaker box and flip the switch for your HVAC (Heating, Ventilation, and Air Conditioning) system. Do not skip this. Even though the voltage is low (24V), a short-circuit during installation can blow a fuse on your furnace’s control board, turning a 30-minute project into an expensive service call.
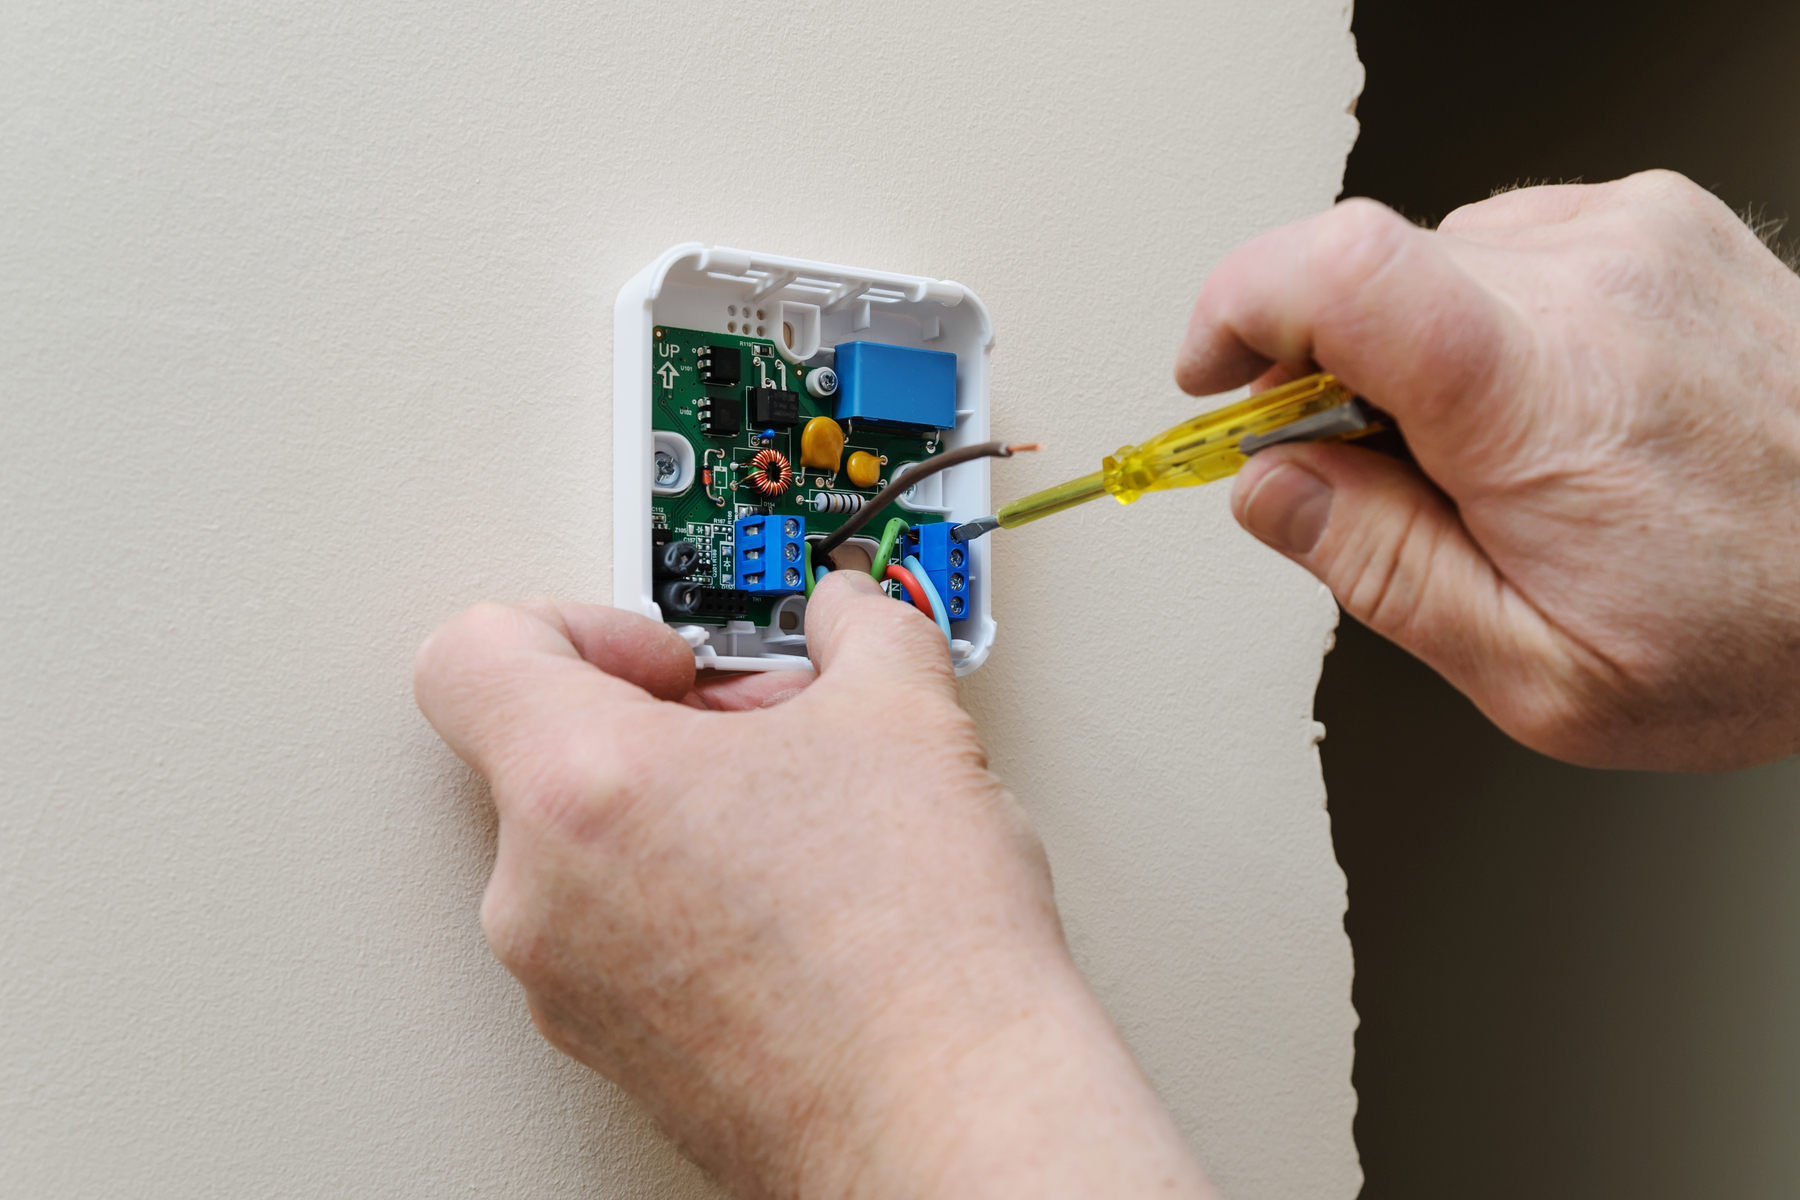
Step #2: Label Before You Disconnect
Remove the old thermostat faceplate to reveal the wiring. Ignore the wire colors. Instead, look at the letters next to the terminals (R, W, Y, G, C). Use small strips of painter’s tape to label each wire with its corresponding letter. Once labeled, unscrew the wires and remove the old wall plate.
Step #3: Mount the New Base
Pull the wires through the center of your new thermostat’s wall plate. Hold the plate against the wall and use a small spirit level (often built into the plate) to ensure it’s straight. Screw the plate into the wall using the provided anchors. If the holes don’t align with the old ones, you may need to drill small pilot holes.
Step #4: The “Click” Connection
Insert the labeled wires into the corresponding terminals on the new base. Most modern thermostats use “push-in” terminals; you simply press a tab and slide the wire in until it locks. Ensure no bare copper is touching other wires, as this could cause a system malfunction.

Step #5: Power Up and Program
Snap the thermostat faceplate onto the base. Return to your breaker box and restore power. Follow the on-screen prompts or use the manufacturer’s app to connect the unit to your Wi-Fi. Set your “Away” and “Sleep” schedules immediately to start saving energy right away.
Pro-Tip: The “C-Wire” Solution
If you open your old thermostat and don’t see a “C” (Common) wire, don’t panic! Many smart thermostats require this wire for constant power. Check the wall behind the unit; sometimes the C-wire is tucked back there, unused. If it’s truly missing, look for a “Power Extender Kit” or “C-Wire Adapter”—most major brands include one in the box to bypass the need for new wiring through your walls.