

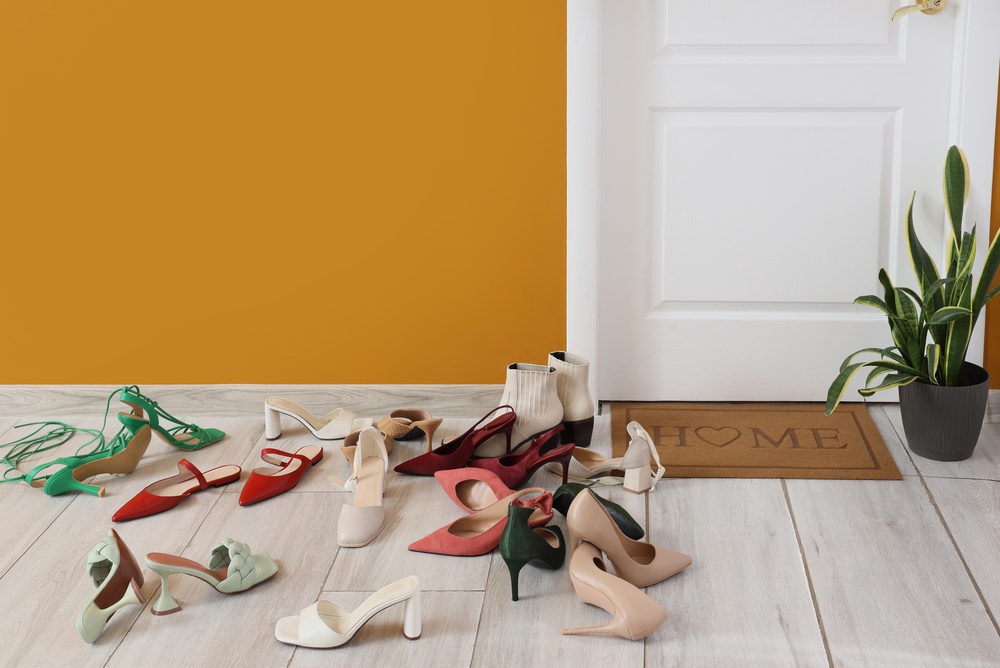
Shoes have a sneaky way of taking over the house. One minute your entryway looks clean, and the next there’s a mountain of sneakers, sandals, and slippers waiting to trip someone. If you’re tired of the clutter but don’t want to spend a fortune on fancy storage furniture, this DIY project might become your new favorite weekend fix.
These stackable shoe boxes are affordable, customizable, and surprisingly stylish. Even better, they’re made using something most of us already have lying around: empty shoe boxes. With a little creativity and a few basic supplies, you can transform messy corners into an organized storage setup that actually looks good.
Whether your style leans modern, cozy, minimalist, or colorful, these DIY compartments can be designed to match your space perfectly.
Why DIY Stackable Shoe Boxes Work So Well?
Traditional shoe racks can be bulky, expensive, or awkwardly sized. DIY stackable compartments solve all of those problems. They’re lightweight, easy to move, and flexible enough to fit small apartments, dorm rooms, closets, or entryways.
The best part? You can build them exactly the way you want.
Need extra storage for boots? Use larger boxes. Want a sleek designer-inspired look? Wrap the boxes in elegant fabric or contact paper. Looking for something playful for a kid’s room? Add bright colors and fun labels.
This project proves that organizing doesn’t have to be boring—or expensive.
What You’ll Need
Before getting started, gather your materials. Using matching boxes creates a cleaner look, but you can mix sizes if needed.
Tools and Materials
- 6–9 empty shoe boxes
- Matching lids for each box
- Hot glue gun or heavy-duty mounting tape
- Decorative paper, fabric, or contact paper
- Cardboard scraps for reinforcement
- Scissors or a box cutter
- Optional extras:
- Spray paint
- Washi tape
- Metal label holders
- Small furniture legs
- Jute rope handles
Step 1: Prep and Personalize Your Boxes
This is where the fun begins. Before assembling anything, decide on the style you want for your storage unit.
For a clean and modern look, try matte black spray paint with metal labels. If you love a softer, cozy aesthetic, wrap the boxes in linen fabric or neutral-toned paper. You can even create a bold statement piece with patterned wallpaper or colorful prints.
One timeless option is striped fabric, which instantly gives the boxes a polished, custom-made appearance.
A little extra effort here makes the final result look far more expensive than it actually is.
Quick Tip
If you’re painting the boxes, let them dry completely and seal them with a clear acrylic spray. This helps protect against scratches and everyday wear.
Step 2: Build the Shoe Compartments
Now it’s time to turn ordinary shoe boxes into functional cubbies.
Place one lid flat on the floor or table with the inside facing upward. Take the matching shoe box, flip it onto its side, and slide it into the lid so it stands upright like an open compartment.
Repeat the process for all your boxes.
Make the Structure Stronger
To keep everything secure:
- Apply hot glue or heavy-duty mounting tape along the sides and bottom where the box meets the lid.
- Add a layer of cardboard underneath inside the lid before attaching the box. This simple trick reinforces the base and prevents sagging over time.
It may seem like a small detail, but reinforcement makes a huge difference in durability.
Step 3: Stack Your Boxes Safely
Once the compartments are ready, begin stacking them into your preferred layout.
Place the strongest or largest boxes on the bottom layer to create a stable foundation. Stacking two or three levels high usually works best for balance and safety.
If you want a taller setup, make sure the structure is properly secured.
How to Prevent Tipping
Nobody wants a collapsing shoe tower. Here’s how to keep it sturdy:
- Use strong glue between each stacked layer
- Allow each layer to dry fully before adding another
- Add weight to the bottom compartment using a flat stone or tile
- Position the unit against a wall for extra support
- Use removable wall anchors or Command strips if children or pets are around
These simple precautions help your DIY organizer stay stable and long-lasting.
Make Your Shoe Storage Last Longer
Even though these compartments are made from recycled boxes, they can hold up surprisingly well with a few upgrades.
Easy Durability Hacks
- Add shelf liner inside each compartment to catch dirt and moisture
- Reinforce the back wall with extra cardboard or thin wood pieces
- Use clear protective spray on painted surfaces
- Avoid overloading compartments with heavy boots
With proper reinforcement, your DIY organizer can stay functional for months—or even years.
A Budget-Friendly Upgrade That Actually Looks Good
One of the best things about this project is how customizable it is. You’re not stuck with plain cardboard or boring designs. You can create something that blends beautifully with your room while solving a real storage problem.
Instead of hiding shoes in random piles, you’ll have a neat display that keeps everything easy to find and easy to access.
And honestly, there’s something satisfying about turning recycled materials into stylish home décor.
So the next time your hallway starts looking like a shoe explosion zone, skip the expensive storage bins and try this DIY solution instead. A few boxes, a little glue, and some creativity might be all you need to completely transform your space.