

Build a stylish and functional table in just two hours
If you’ve ever wanted a custom coffee table or side table but thought it would take a full weekend or expensive materials, think again. With a little planning, basic supplies, and just two hours, you can create a functional and attractive piece for your living room or bedroom. DIY furniture doesn’t have to be complicated, and the satisfaction of making something yourself is unmatched.
Gather Your Materials
The first step is to collect everything you need. For this project, basic materials like a wooden board, four legs, screws, and brackets are enough. You may also want sandpaper, paint or stain, a measuring tape, and a drill. Using materials you already have at home can reduce cost and make the project easier. The key is simplicity—choose a wooden board that fits your space and legs that provide stability.
Plan Your Design
Before starting, decide on the size and style of your table. Coffee tables are usually lower and wider, while side tables are taller and more compact. Sketch a simple design to guide your build. Knowing the dimensions and placement of legs beforehand helps prevent mistakes and ensures the table will be balanced. Simple shapes, like a rectangle or square, are perfect for a two-hour project.
Prepare the Wood
Start by sanding the wooden board to smooth out any rough edges. This makes it safer to handle and gives the surface a finished feel. If you want to paint or stain the wood, do it before attaching the legs. Allow the finish to dry while you prepare the hardware. This step improves the final appearance and lets you customize the color to match your decor.
Attach the Legs
Once the board is ready, it’s time to attach the legs. Measure and mark the positions where each leg will go to ensure balance. Use brackets and screws to secure each leg to the board. A drill makes this process fast and ensures the legs are firmly attached. Check the table after attaching the legs to make sure it stands evenly and does not wobble. Adjust if needed.
Add Finishing Touches
After assembly, inspect the table for any rough spots or uneven paint. Add felt pads to the bottom of the legs to protect your floor and make moving the table easier. If desired, you can also add a small decorative element, like a trim around the edges, to enhance the design. Even simple finishing touches can make a big difference in the table’s overall look.
Enjoy Your DIY Table
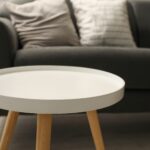
In just two hours, you have a custom table ready to use. Place it in your living room as a coffee table or next to a chair as a side table. The best part is that it reflects your personal style and effort. DIY furniture like this is not only functional but also a fun way to add personality to your space without spending a lot of money.
With a clear plan, basic materials, and two hours, creating your own coffee or side table is simple and rewarding. This project shows that you don’t need expensive tools or complex skills to make stylish, functional furniture for your home.