
Setting up a new LED TV or moving it around your home can feel like a big task—but it is actually quite manageable if you follow the right steps. Whether you’re upgrading your living room setup or shifting houses, this guide will walk you through everything in a simple, practical way.
What You Will Need Before You Start
Before you touch your TV or wall, gather these basics:
- Wall mount bracket (fixed, tilting, or full-motion)
- Screwdriver set
- Drill machine (if mounting on a wall)
- Measuring tape
- Level tool (to keep your TV straight)
- Stud finder (very important for safety)
- Soft cloth or blanket (for protection)
- A helper (highly recommended)
Part 1: How to Install an LED TV on the Wall?

Step 1: Choose the Perfect Spot
Pick a wall that:
- Has a comfortable viewing height (eye level when seated is ideal)
- Avoids direct sunlight glare
- Has nearby power sockets
Tip: Sit where you will usually watch TV and check the viewing angle before drilling anything.
Step 2: Find the Wall Studs
Use a stud finder to locate strong wooden or metal supports inside your wall.
- Never mount a TV on plain drywall alone
- Mark stud positions with a pencil
This step is crucial for safety—your TV’s weight depends on it.
Step 3: Attach the Brackets to the TV
Most LED TVs follow the VESA mounting system.
- Align the bracket holes with the TV’s back
- Screw them tightly but gently (do not over-tighten)
- Make sure everything is centered
Step 4: Fix the Wall Plate
- Hold the wall mount plate against the marked studs
- Use a level tool to keep it straight
- Drill and secure bolts firmly into the studs
Take your time here—this is the “foundation” of your setup.
Step 5: Mount the TV on the Wall
This is the moment.
- Lift the TV with help (never alone for large TVs)
- Hook or lock it onto the wall bracket
- Double-check stability by gently testing
Step 6: Manage Cables Neatly
- Use cable clips or a cable cover
- Keep wires hidden for a clean look
- Connect HDMI, power, and other devices
Part 2: How to Demount (Remove) an LED TV Safely?
Maybe you’re moving house or upgrading your setup. Removing a TV is just as important as installing it properly.
Step 1: Turn Everything Off
- Switch off the TV
- Unplug all cables
- Wait a few minutes to ensure safety
Step 2: Remove Cables Carefully
- Label cables if needed (HDMI, power, audio)
- Gently unplug without pulling forcefully
Step 3: Unlock the TV from Mount
Depending on your bracket type:
- Press release tabs (for quick-release mounts)
- Unscrew locking bolts (for fixed mounts)
- Always have a helper holding the TV
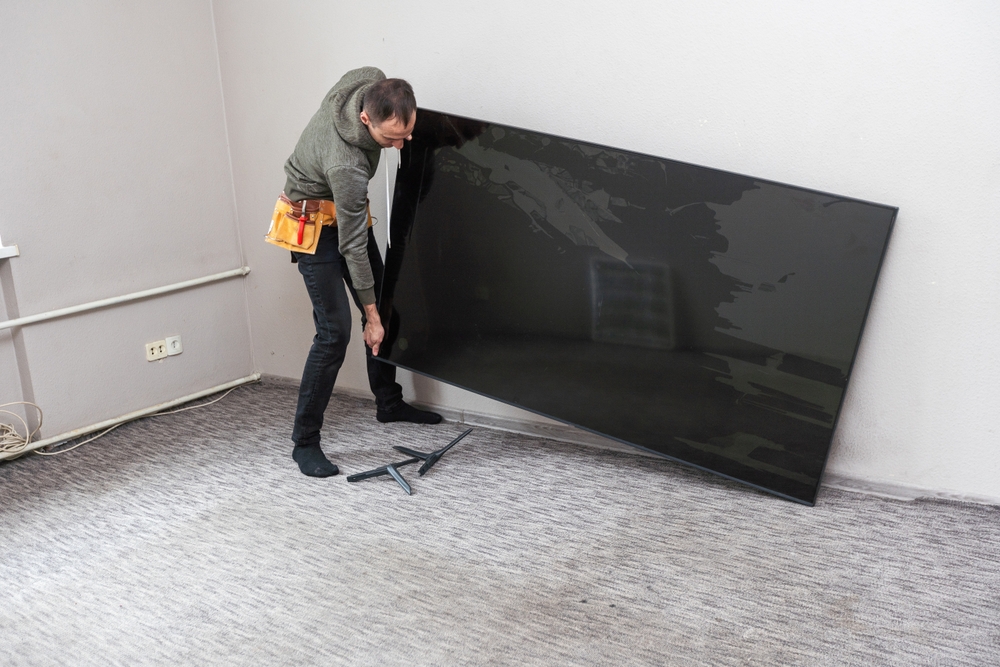
Step 4: Lift the TV Down Slowly
- Hold the TV firmly on both sides
- Lift upward slightly and then pull away
- Place it on a soft surface immediately
Step 5: Remove Wall Bracket (Optional)
- Unscrew the wall plate
- Patch holes if you will not reuse them
- Keep screws if you plan to reinstall later
Safety Tips You Should Never Ignore
- Do not attempt installation alone for large TVs
- Always double-check wall strength
- Avoid mounting above unstable furniture
- Keep children and pets away during installation
- Use certified wall mounts (cheap ones can be risky)
Installing or demounting an LED TV is not just about tools—it is about patience, planning, and safety. Once done correctly, you get a clean, cinema-like setup that enhances your entire room.
So take your time, follow each step carefully, and enjoy your perfectly mounted screen.