

An outdated lampshade can drag down an entire room. Its fix cost is almost nothing and takes only half an hour. Here is how to do it.
First of All: Choose Your Direction
Before you grab supplies, decide on the finish you want. This shapes everything, including the material you buy, the adhesive you use, and the overall feel of the result.
Path A: Fabric
Fabric gives warmth, texture, and pattern. It softens light and adds depth. Good for bedrooms, living rooms, or anywhere you want the lamp to feel like a design choice. Linen, cotton, and lightweight canvas all work well. Avoid anything stretchy or too sheer.
Path B: Paper
The paper gives a cleaner, more graphic result. It’s crisper and more modern. Good for offices, reading corners, or minimalist spaces. Wrapping paper, kraft paper, wallpaper samples, and even sheet music or book pages all work. Thicker paper holds better than tissue-weight paper.
What You’ll Need
- A plain lampshade (fabric and seam-free works best)
- Your chosen fabric or paper
- Spray adhesive or Mod Podge
- Scissors and a craft knife
- Ruler and pencil
- A brayer or bone folder (or just a credit card)
- Clothespins or binder clips
- Scrap paper to protect your work surface
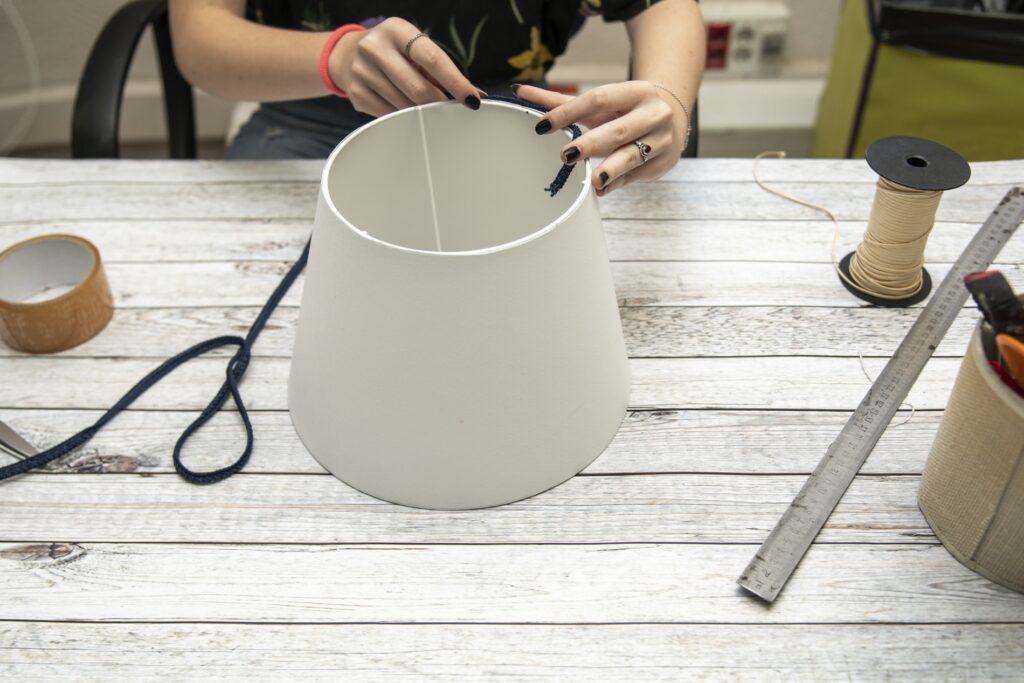
Prep the Shade
Wipe the shade down with a dry cloth to remove dust. If it has any existing texture, lightly sand it with fine-grit sandpaper for better adhesion.
To create your template, roll the shade slowly across a large sheet of kraft or butcher paper, tracing the top and bottom edges as it rolls. Cut out the shape and test the fit before cutting your actual material — lampshades are rarely as symmetrical as they look.
Path A: Applying Fabric
Cut your fabric using the template, adding a half-inch overlap on all edges. Working in sections, apply spray adhesive to the shade (not the fabric) and press the fabric on smoothly, starting from the seam line and working outward.
Pull the fabric taut as you go — wrinkles happen when you lay it flat instead of stretching it lightly against the curve. Use a credit card or brayer to smooth out bubbles as you press.
At the top and bottom edges, snip small V-cuts into the excess fabric so it folds over without bunching. Press firmly and hold with the clips while it sets.
Tip: A thin ribbon or trim glued along the top and bottom edge conceals any uneven folding and adds a finished look in under five minutes.
Path B: Applying Paper
Paper is less forgiving than fabric, so measure and cut precisely. Apply Mod Podge to the shade in a thin, even layer, then lay the paper on carefully — you get one shot before it starts to bond.
Smooth from the center outward using a bone folder or credit card. Work fast and keep your movements deliberate. At the overlap seam, trim cleanly with a craft knife against a ruler for a nearly invisible join.
Fold the top and bottom edges over, making small cuts around curves so the paper lies flat. Seal the entire outside surface with a final coat of Mod Podge for durability and a slight sheen.
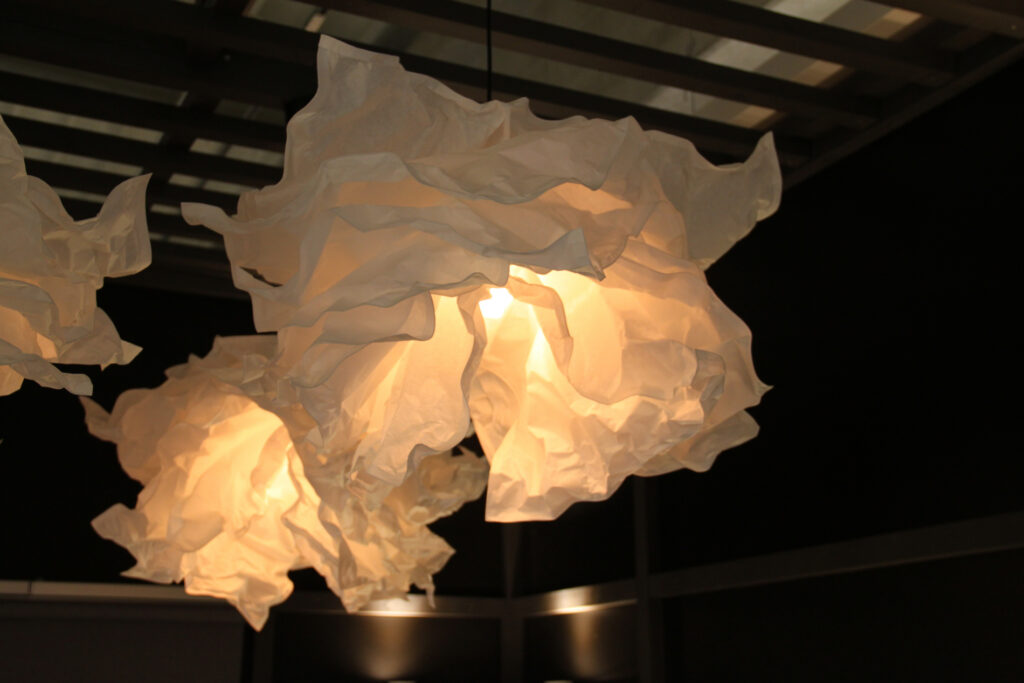
The Finished Result
Let the shade dry for 20 minutes before placing it back on the lamp. When the light comes on, your material choice will glow — fabric softly, paper crisply. Either way, it looks like something you bought, not something you made on a Saturday afternoon.